Frequency counters & interval timers are easy to use but some key hints, tips, pointers & techniques can help ensure the best readings are made as easily as possible.
Frequency counters and interval timers are very easy to use. However, knowing how to use a frequency counter and time interval counter can help make the best readings in the easiest manner.
Knowing how to use a frequency counter can enable accurate measurements to be made as quickly as possible, preventing some of the pitfalls that present themselves and also preventing damage to the test instrument that can occur under some circumstances.
How to use a frequency counter
In many ways using a frequency counter is very simple. It is often just a matter of turning the counter on and applying the signal to the input.
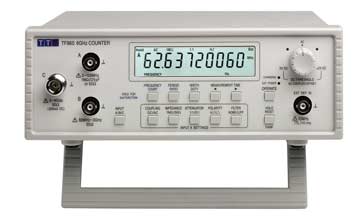
Frequency counters and timers can be used for measuring many signals from digital logic signals through to RF and microwaves. Counter technology has developed so that these frequency counters and timers are able to measure time intervals as well as frequency. Using digital processing technology it is possible to measure both time interval and frequency as one is the inverse of the other.
To make a simple measurement of frequency or time interval it is necessary to apply the signal to the input.
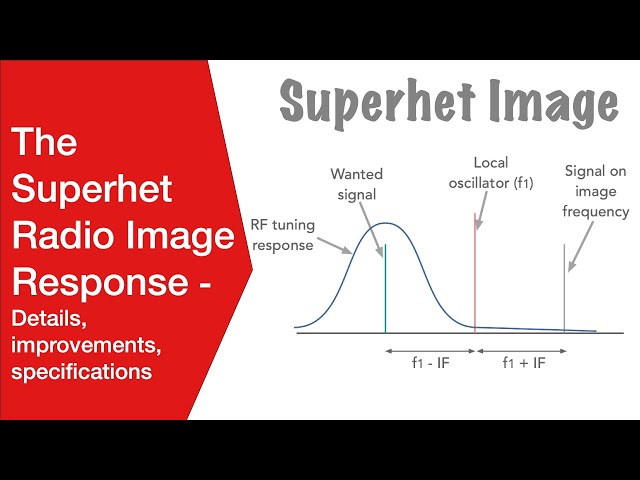
When using a frequency counter, it is necessary to select the time base interval. Typically options of 0.1s, 1s, 10s are the most common. These refer to the length of time over which the frequency counter gate is open and incoming pulses are counted. Thus, for a gate time of 1 second, 1 000 000 pulses will be counted for a 1 MHz signal, or in the simple example below, if five pulses are counted, with a gate time of a second, then the frequency is 5Hz.
Frequency counter counting
Here it can be seen that each time the signal passes through the frequency counter trigger level in the positive direction, the counter counts the transition. The higher the frequency, the more pulses that are counted. As seen five pulses are counted. Assuming a gate time of 1 second, this would indicate a frequency of 5Hz. Had the gate time been 0.1 s then it would indicate a frequency of 50 Hz.
Longer gate times will naturally give more accurate results. Take the example of a gate time of 0.1 s and five pulses counted indicating a 50 Hz signal. Cutting the explanation to its simplest, the system cannot differentiate between a signal that is running at 50 Hz and one that is at 55 Hz for example. Both will give five counts in a time of 0.1s. To give a better indication of the frequency, a 1 second gate time will enable 55 counts if the signal is running at 55 Hz for example.
Although longer gate times give better levels of accuracy, the choice of gate time is normally more dependent upon the need for rapid updates in the frequency. A longer gate time, for example will slow and automated test, or for the engineer working on the bench the additional waiting time can be annoying. Accordingly short gate times are normally used unless high levels of accuracy are needed.
Frequency counters normally have a high impedance input. This is typically 1MΩ. It is possible to use a X1 scope probe to connect the counter to the point n the circuit under test. As the scope probe has a clip and a BNC input this often makes a very convenient way of connecting and probing.
Many high frequency counters have a 50Ω input in addition to the high impedance input - it may be a separate connector, or switchable. When using the 50Ω input the maximum input voltage will be much less, so beware of the signal amplitude as damage can easily result if the input is overloaded.
How to use a time interval counter / interval timer
It is possible to make a variety of time interval measurements using a counter- timer. The types of time interval measurement that can be made vary according to the counter timer in use.
Single input time interval measurements: The basic form of counter timer is one with a single input. Typically any measurements will be made on the rising edge of a waveform. The basic measurement will be made from the rising edge of the waveform to the next rising edge that is seen. This gives the time interval for the waveform. On occasions it may be possible to make a measurement using a single input counter from the rising or positive edge to the falling or negative edge. Switches on the front panel or remote programming techniques are used to select the required edges.
Time interval measurement for a repetitive waveform
Dual input time interval measurements: Some counter timers that can be used have dual inputs. This form of time interval measurement can be used with two waveforms and it is normal for there to be selectable positive (rising) or negative going (falling) edge selection on both channels. To set this up, it is simply a matter of connecting the required waveforms to the inputs and then selecting the edges.
Measurement variants for the time interval of two waveforms
It can be seen that there are four combinations of timing. In the diagram, A+ indicates waveform A rising edge, and B- for example means waveform B falling edge.
Hints and tips for using a frequency counter / interval timer
When using a frequency counter there are a number of general precautions that can be adopted to ensure that the most accurate result is achieved.
Keep frequency counter timebase / clock warm: The timebase of clock within a frequency counter / timer governs the overall accuracy of the instrument. While the levels of drift are small, the frequency does vary by small amounts, especially as the instrument, and hence the oscillator warms up. Even highly accurate oven controlled crystal oscillators drift as they come up to temperature. Accordingly it is best to keep the timebase at operating temperature by turning the instrument on a few hours before use. They may even require leaving on over-night, etc.
Buy instrument with accurate timebase: As the accuracy of the timebase directly reflects onto the accuracy of the measurement, when there is a need to make accurate measurements it is necessary to use an instrument with an accurate timebase, or use an external one that is very accurate. Most counters and timers have the ability to use an external timebase or clock oscillator.
Do not overload input: When using a frequency counter, most signals can be applied to the input with little fear of overload. Logic, e.g. TTL or most other families and most RF signals will be fine. However if large signals are present care must be taken not to overload the input or even cause damage to it. This may be particularly true when using some RF frequency counters that may have a 50Ω input. The internal load may only be capable of handling a limited power. If high power levels are to be used a matched attenuator must be used to reduce the signal level to an acceptable level otherwise the internal load resistor will be damaged.
For noisy signals, pay attention to trigger error : When using a frequency counter or timer with a noisy signal, the noise can cause spurious counts which will affect the reading. To avoid this, careful setting of the trigger point can move the trigger level to a point where it is unlikely to cause false triggers.
Remember to calibrate: With various aspects such as crystal ageing that will affect even the most accurate crystal based clock oscillators or timebases, it is necessary to ensure that the timebase frequency is maintained as accurately as possible an all other functions are operating within their specified ranges.
Lock all timebases to a single clock: When a system uses several timebases, there are possibilities of jitter and skew between the signals that can cause some inaccuracies. To overcome this it is often wise to lock all the elements of a system to a single accurate timebase. Most frequency counters have an external clock of timebase input that can enable an external timebase to be used for the frequency counter. Alternatively it may also be possible to use the frequency counter timebase as there is often an output available from the internal oscillator / timebase.
Very good results are normally obtained from frequency counters and timers. It is normally just necessary to plug the test instrument in, turn it on and connect it to the points where the frequency or time interval measurements need to be made. It is possible to make fast and accurate measurements. Applying a few simple hints, tips and techniques can ensure that the best measurements are made and the test instrument is protected from any damage.
Fact of the day: It was on this day in 1965 that Moore\'s Law was first published in an article about the future of semiconductor components. At the time, Gordon Moore who wrote about it was the head of research and development for Fairchild Semiconductor and later he went on to co-found Intel.
Quote:Nothing is too wonderful to be true if it be consistent with the laws of nature. Michael Faraday (1791 - 1867).
Point to ponder: It was not immediately obvious to everyone, the importance of the invention of the telephone. The President of the Western Union Telegraph company in the USA turned down an offer to buy all the rights to the invention, and in the last few years of the 19t